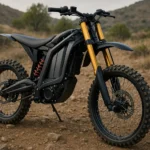
Knowing how to bleed brakes on electric dirt bike is one of the most important skills every rider or parent should understand. When air bubbles sneak into the hydraulic brake system, your stopping power drops fast, making rides unsafe. A brake lever that feels spongy or weak is a clear sign that it’s time to act. Just like refreshing your chain oil keeps the drivetrain smooth, bleeding brakes restores consistency and confidence on every ride.
Learning how to bleed brakes on electric dirt bike also saves money on unnecessary shop visits and helps young riders build responsibility for their gear. Hydraulic systems rely on pressure, and any trapped air reduces efficiency. Think of it like trying to squeeze a balloon filled with both water and air—some force escapes without control. That’s why removing bubbles through proper brake bleeding is a must.
Parents especially should pay attention. Kids often ride aggressively on trails or neighborhood tracks, and poorly maintained brakes can turn into serious accidents. By understanding how to bleed brakes on electric dirt bike, you’re not only improving performance—you’re ensuring safer adventures. If you’re still new to this world, check out our full beginner’s breakdown here: what is an electric dirt bike.
Key Takeaways
- Learn the exact tools and fluid you need before starting.
- Step-by-step process to remove air bubbles and restore brake power.
- Common mistakes riders make (and how to avoid them).
- Safety checks before hitting the trails again.
⚡ Here’s what you’ll get from this guide: Quick links below take you straight to the section you’re most curious about 👇
Understanding Brake Bleeding Basics
Before jumping into the steps, it’s important to understand the basics of how to bleed brakes on electric dirt bike. Brake bleeding is simply the process of pushing old brake fluid and air bubbles out of the hydraulic system to restore consistent stopping power.
When air enters the brake line, the lever feels soft instead of firm, and the bike doesn’t stop as quickly. This happens because air compresses while brake fluid does not, which reduces pressure in the system. Riders often describe it as a “spongy brake lever.”
Bleeding the system keeps braking performance sharp and reliable. For young riders, parents, and trail enthusiasts, this means fewer accidents and more control on steep descents or rough tracks. Think of it as keeping the lifeline of your dirt bike’s braking system clean, steady, and ready for action.
Other terms you may hear in this context include hydraulic brake service, brake fluid flush, and disc brake maintenance. All of them point to the same goal: making sure your braking system reacts instantly when you need it most. 🚴♂️💨

Tools and Materials You’ll Need
Before starting the process of how to bleed brakes on electric dirt bike, it’s crucial to gather all the right tools and supplies. Having everything ready makes the job smoother and prevents unnecessary interruptions.
You’ll need the correct brake fluid, usually DOT 4 or DOT 5.1, depending on your bike’s specifications. Always check your owner’s manual before buying. A quality bleed kit is also essential, which typically includes a syringe, tubing, and a catch bottle to safely collect old fluid.
Basic hand tools like Allen keys, a wrench for the bleed nipple, and a set of clean rags will help you manage the task without making a mess. Gloves and eye protection are also recommended since brake fluid is corrosive and can damage skin or paint.
Keeping these items organized not only speeds up the bleeding process but also ensures a cleaner, more reliable outcome. Think of it as preparing a toolbox for a safe and efficient brake service session. 🧰⚡
Step-by-Step: How to Bleed Brakes on Electric Dirt Bike
The actual process of how to bleed brakes on electric dirt bike may sound intimidating at first, but breaking it into clear steps makes it simple and manageable.
1. Prepare Your Workspace
Choose a flat, stable surface with good lighting. Lay down old towels or cardboard to catch any spilled brake fluid. Safety gear like gloves and glasses will protect you from accidental splashes.
2. Remove the Reservoir Cap
Locate the brake reservoir on your handlebars. Gently remove the cap and inspect the fluid level. Keep some paper towels nearby to prevent spills from damaging your bike’s paint or plastics.
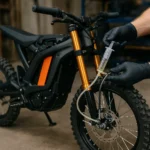
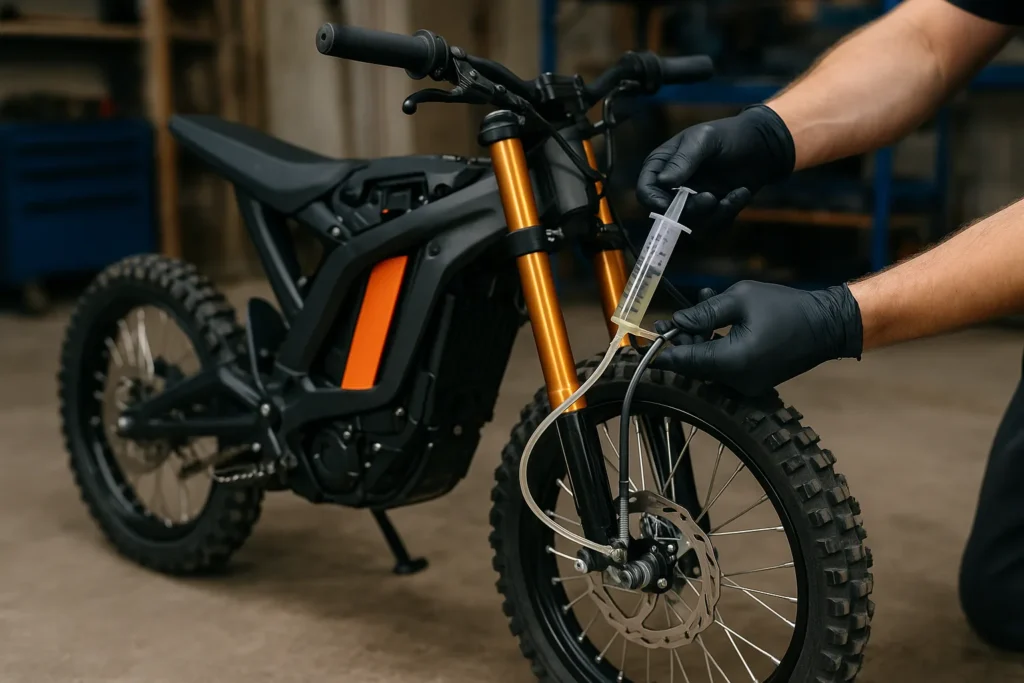
3. Attach the Bleed Kit
Connect the tubing from your bleed kit to the caliper’s bleed nipple. Make sure it fits tightly, and place the other end into a clear catch bottle so you can see the air bubbles escape.
4. Pump and Release
Slowly pull the brake lever, then open the bleed screw just enough for fluid to pass through. You’ll see bubbles flow into the tubing. Close the screw before releasing the lever to avoid pulling air back inside.
5. Refill and Repeat
Keep topping up the reservoir with fresh fluid as you go. Repeat the pump-and-release cycle until the tubing shows a steady flow of fluid without bubbles.
6. Final Cleanup
Tighten the bleed screw, secure the reservoir cap, and wipe down any excess fluid. Dispose of the old brake fluid safely since it’s harmful to the environment.
Completing these steps carefully ensures your brakes feel firm and consistent again, giving you more confidence on the trails. 🔧🚵
Common Mistakes to Avoid
Even if you follow the steps carefully, small errors can undo all your hard work. One common mistake during how to bleed brakes on electric dirt bike is letting the reservoir run dry. When that happens, air sneaks back into the system, and you’ll need to start over.
Another issue is using the wrong brake fluid. Mixing DOT 4 with DOT 5.1 or any silicone-based fluid can damage seals and reduce performance. Riders should always double-check their manual to confirm the right fluid type.
Over-tightening the bleed screw is also a problem. It can strip threads or crack components, leading to leaks. Tighten it firmly but gently.
For a clear demonstration and extra confidence, you can watch this helpful video on bleeding e-bike brakes. Seeing the process in action makes it easier to avoid these mistakes.
By staying aware of these pitfalls, you’ll keep your brake system sharp, reliable, and ready for the next ride. 🚵♀️⚡
How Often Should You Bleed Electric Dirt Bike Brakes?
Riders often wonder how frequently they should perform how to bleed brakes on electric dirt bike to maintain peak performance. The truth is, there isn’t a one-size-fits-all answer—it depends on how often and how hard you ride.
As a general rule, hydraulic systems should be serviced every 6 to 12 months. If you ride aggressively on steep trails, hit muddy terrain, or notice your lever starting to feel soft, it’s time to flush the system.
Another sign is reduced stopping power during long downhill runs. Excess heat can cause fluid to degrade faster, leading to inconsistent braking. Parents should pay close attention when kids ride regularly, since younger riders may not notice the loss of responsiveness until it becomes dangerous.
By following these guidelines and monitoring your brake feel, you’ll ensure a safer and more enjoyable ride every time. 🏞️🚴
Comparison Table: DOT 4 vs DOT 5.1 Brake Fluids
Choosing the right brake fluid is just as important as learning how to bleed brakes on electric dirt bike. Both DOT 4 and DOT 5.1 are common, but they have different characteristics that affect performance and durability.
| Feature | DOT 4 | DOT 5.1 |
|---|---|---|
| Boiling Point | Medium | Higher (better) |
| Moisture Absorption | Yes | Yes |
| Best For | Casual riding | Aggressive/long rides |
| Price | Lower | Higher |
DOT 4 works well for most riders who stick to casual trails or lighter riding styles. On the other hand, DOT 5.1 is better for heavy use, competitive racing, or downhill tracks where brakes heat up quickly.
Understanding the difference ensures you don’t just maintain your brakes—you optimize them for the kind of rides you love. For a broader look at how electric dirt bikes work overall, check out this guide on what is an electric dirt bike.
Selecting the right fluid paired with proper maintenance will keep your stopping power consistent and your confidence high. ⚡🛠️
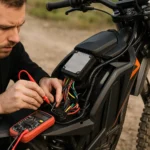
Safety Check Before Riding Again
Once you’ve completed how to bleed brakes on electric dirt bike, it’s essential to make sure everything is working perfectly before heading back to the trails. A quick safety check can prevent accidents and keep your riding experience smooth.
Start by squeezing the brake lever firmly. It should feel solid, not spongy, and respond immediately. Spin the wheels and apply the brakes several times to confirm consistent stopping power.
Next, inspect the calipers and lines for any leaks. Even a small drip of brake fluid can signal a bigger problem and should be addressed right away. Finally, give the bike a short test ride in a controlled area to make sure the braking force is balanced on both wheels.
These simple checks add only a few minutes but provide peace of mind knowing your brakes are ready for the ride. 🚴♂️✅
Pro Tips for Smooth Bleeding
Even after mastering how to bleed brakes on electric dirt bike, there are a few expert tricks that can make the process easier and more effective. One of the best tips is to always use fresh, unopened brake fluid—old bottles can absorb moisture, which lowers performance.
Another useful technique is tapping the brake lines gently with a tool during the bleeding process. This helps release stubborn air bubbles that might cling to the inside of the hose. Riders who skip this step sometimes find their lever still feels soft even after a full bleed.
It’s also smart to bleed the brakes anytime you install new calipers or after long, muddy rides. Keeping a maintenance schedule ensures the hydraulic system stays reliable and responsive.
By applying these pro-level details, you’ll keep your dirt bike’s brakes performing at their peak and avoid the frustration of repeat maintenance. 🔧⚡
FAQs About Bleeding Electric Dirt Bike Brakes
Q1: How do I know if my brakes need bleeding?
If the lever feels soft, spongy, or the stopping power fades during rides, it’s time to perform how to bleed brakes on electric dirt bike. These are the clearest signs air has entered the hydraulic system.
Q2: Can I ride without bleeding the brakes?
Technically you can, but it’s unsafe. A weak or inconsistent brake system increases the risk of accidents, especially on steep trails or during fast descents.
Q3: How long does the process take?
With the right tools and some preparation, bleeding usually takes around 20–30 minutes. Experienced riders may finish even faster.
Q4: Do the front and rear brakes need to be bled separately?
Yes. Each hydraulic line is independent, so you need to flush both if air has entered both systems.
Q5: What happens if I use the wrong brake fluid?
Using fluid not recommended for your bike can damage seals and lower performance. Always check whether your bike requires DOT 4 or DOT 5.1.
These answers cover the most common concerns, giving riders the confidence to handle brake maintenance safely and correctly. 🏁
Final Thoughts: Keep Your Rides Safe and Fun
Mastering how to bleed brakes on electric dirt bike is not just about learning a maintenance trick—it’s about ensuring safety and boosting confidence every time you ride. When brakes feel responsive and firm, riders can focus on enjoying the trail instead of worrying about stopping power.
Regular care also extends the life of your components. By keeping the hydraulic system free of air bubbles and topped with the right fluid, you reduce wear and tear on calipers, levers, and hoses. This means fewer repairs and more time out on the dirt.
For parents, properly maintained brakes give peace of mind knowing their kids are riding with dependable stopping power. For young riders, it builds responsibility and knowledge that makes them safer on every adventure.
Taking a little time for brake maintenance today creates smoother, safer, and more exciting rides tomorrow. 🚵⚡
Share Your Experience and Join the Conversation
Now that you understand how to bleed brakes on electric dirt bike, it’s time to put that knowledge into action. Whether you’re a parent helping your kid maintain their first ride or an experienced rider fine-tuning your own bike, your story can inspire others in the community.
We encourage you to drop your tips, questions, or even funny brake-bleeding fails in the comments. Sharing real-world experiences helps new riders feel supported and connected. For those who are just discovering the world of e-dirt riding, this beginner-friendly breakdown of what is an electric dirt bike is the perfect place to start.
Don’t forget to share this guide with friends or on social media so more riders can learn the importance of proper brake maintenance. Together, we can keep the trails safer and the rides more exciting. 🚵🔥

Tyler Brooks is the storyteller behind most of the content at Electric Dirt Zone. With over 10 years of experience in digital media and a lifelong love for off-road riding, he blends technical insight from the team with engaging, down-to-earth writing. When he’s not turning dusty trail rides into blog posts, you’ll probably find him snapping pics before things get too wild.