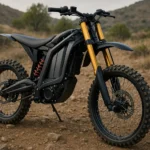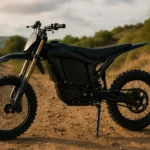
If you’ve ever wished your rides could last longer without paying a shop every time, you’re in the right place. An electric dirt bike DIY battery swap is one of the smartest ways to increase range, improve performance, and keep costs down. By learning how to handle the process yourself, you’re not just saving money—you’re gaining real control over your machine’s power system ⚡.
A proper electric dirt bike DIY battery swap means understanding the basics of voltage, watt-hours, connectors, and a reliable BMS. Riders who take the time to learn this end up with longer rides, more confidence off-road, and the freedom to customize their bikes to their own riding style. Whether you’re looking for endurance on trails or just want your teen’s bike to last an afternoon without cutting out, this guide will break everything down in simple steps.
For those who are brand new, our beginner’s guide to electric dirt bikes is a great place to start. It’ll give you the foundation you need before diving into your first electric dirt bike DIY battery swap, making the technical parts way easier to understand.
Key Takeaways
- You’ll learn how to plan, source, and install a compatible pack with minimal risk.
- We’ll cover connectors, BMS, capacity (Ah/Wh), and voltage matching.
- You’ll get a 10-step checklist, a parts map, and a troubleshooting flow.
- We’ll show you how to preserve battery life and keep warranties intact.
- Expect simple diagrams, a comparison table, and real-world examples 🔧
⚡ Heads-up: Use the quick links below to jump straight to the section you need most 👇
Understanding the Mission (Start Here)
Before you grab tools or order parts, it’s important to understand what an electric dirt bike DIY battery swap really means. This isn’t just about throwing in a bigger battery—it’s about making sure voltage, capacity, and discharge rates all match your bike’s system so nothing overheats or shuts down mid-ride 🔋.
Think of your battery pack as the “fuel tank” and the controller as the “engine brain.” If these two aren’t in sync, you can run into issues like power cutouts, reduced performance, or even permanent damage. By learning the basics of watt-hours, amp-hours, and continuous vs. peak current, you’ll be ready to make smart choices that boost range without compromising safety.
DIY upgrades shine when you’re dealing with range anxiety, worn-out packs, or simply wanting more freedom than stock batteries provide. Riders often find that doing the work themselves means not only saving cash but also gaining a deeper understanding of how their bike truly performs on trails and hills.
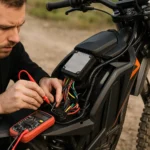
Safety First: Non-Negotiables You Must Follow
When tackling an electric dirt bike DIY battery swap, safety isn’t just a suggestion—it’s the foundation of every step you take. Working with lithium-ion cells means dealing with high voltage, thermal risks, and sensitive electronics. Even small mistakes can lead to overheating, fire hazards, or permanent damage to your bike. 🔥
Always wear protective gloves and safety glasses when handling packs. Use a fire-safe charging bag when testing, and never charge batteries on flammable surfaces like wood or carpet. A multimeter should be your best friend—double-check polarity, voltage, and continuity before making any connections.
It’s also smart to follow proven best practices from experts who specialize in lithium battery safety. For a deep dive into real-world methods, check out this Complete 7280Wh Electric Dirt Bike Battery Build on YouTube. Watching how experienced builders manage wiring, BMS installation, and pack assembly can give you extra confidence before starting your own project.
By respecting the chemistry, using the right protective gear, and taking every precaution seriously, you’ll avoid costly mistakes and keep your bike running strong for years to come. 🚀
Specs That Matter (and How to Read Them)
Before investing in parts, it’s essential to understand the technical specs that guide a safe and effective electric dirt bike DIY battery swap. These numbers aren’t just labels on a box—they determine how your bike performs, how far it travels, and how reliable it will be on the trail. ⚡
Voltage (V) works like water pressure. Higher voltage usually means more torque and speed potential, but only if your controller is designed to handle it. Capacity, measured in amp-hours (Ah) or watt-hours (Wh), is your “fuel tank size” and directly impacts range. The higher the Wh, the longer you can ride without charging.
Discharge current (A) defines how much power your pack can safely deliver at once. A strong continuous discharge rating ensures your bike won’t cut out on steep climbs or aggressive acceleration. The Battery Management System (BMS) acts as a traffic cop, monitoring temperature, current flow, and keeping your pack balanced.
Connectors—like XT60, XT90, or Anderson plugs—are the final piece of the puzzle. Matching the right connector type prevents bottlenecks and overheating, making sure every watt of stored energy is efficiently delivered to the motor. By knowing what each spec represents, riders gain the confidence to choose the right battery without guesswork. 🔋
Compatibility Map: Bike ⇄ Battery ⇄ Controller
The success of an electric dirt bike DIY battery swap depends on how well your new pack communicates with your bike’s existing components. Think of it as making sure everyone in the system speaks the same language—battery, controller, and motor all need to be aligned.
Voltage must match what the controller is rated for. A 48V pack on a 48V system is straightforward, but pushing up to 52V or 60V requires confirming the controller’s tolerance. If you exceed those limits, you risk overheating, triggering cutoffs, or damaging electronics.
Current draw is equally important. Your controller and motor demand a steady flow of amps, and if the pack can’t deliver, you’ll notice power sag on steep trails or sudden shutdowns under load. Choosing the right discharge rating means smoother acceleration and fewer performance hiccups.
Finally, connectors and polarity checks tie everything together. Whether you’re using XT90, QS8, or Anderson plugs, consistent connections prevent heat buildup and ensure reliable power delivery. If you’re still building your foundation of knowledge, our complete guide to electric dirt bikes explains the basics of specs and will help you understand why matching these elements is so critical.
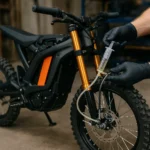
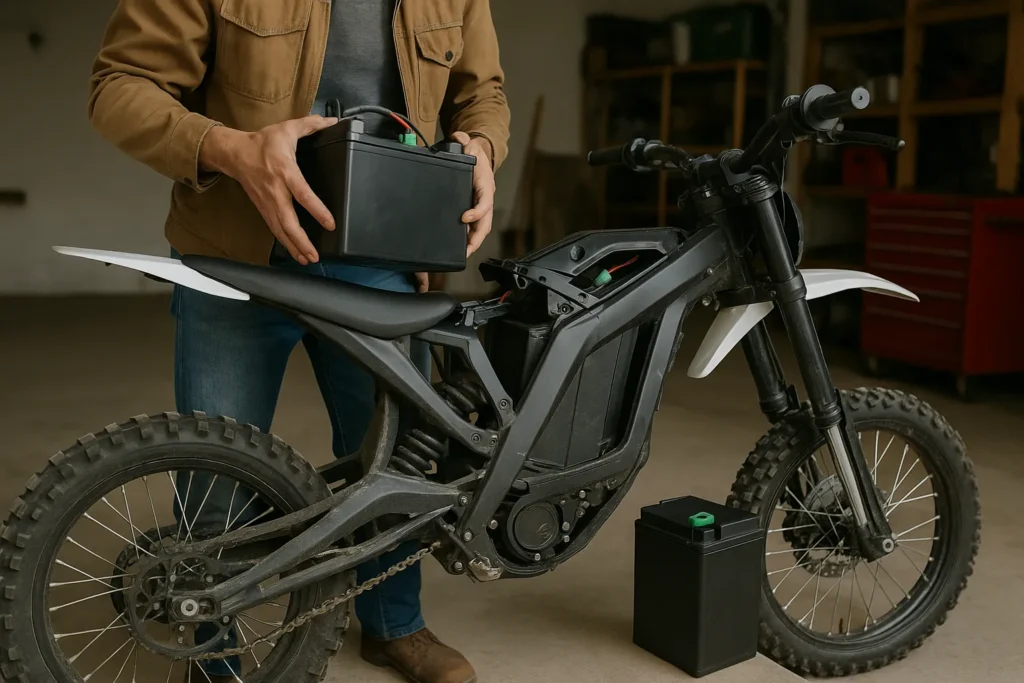
Parts & Tools You’ll Actually Use (with Cheap Alternatives)
To complete an electric dirt bike DIY battery swap, you’ll need a handful of reliable tools and components. Skimping here often leads to frustration or unsafe results, so it pays to prepare properly before starting the project. 🛠️
A quality multimeter is essential for checking voltage, polarity, and continuity. Wire cutters, crimpers, and a soldering iron will help you manage connectors and ensure strong, vibration-resistant joints. Heat shrink tubing and dielectric grease protect your wiring against moisture and corrosion.
For assembly, anti-spark connectors reduce the risk of sudden current surges when you plug in a new pack. Zip ties, Velcro straps, and foam padding provide stability, keeping cables secure and preventing chafing on rough terrain.
Budget-conscious riders can save money by repurposing common tools from home, but investing in a few specialized items like proper crimping pliers and a fire-safe charging bag will dramatically improve both safety and long-term reliability. The right gear doesn’t just make the swap easier—it ensures every ride is safer and more dependable. 🔋
Mounting Methods That Don’t Rattle Loose
Once you’ve selected the right pack for your electric dirt bike DIY battery swap, the next challenge is making sure it stays secure no matter how rough the ride gets. Off-road trails deliver constant vibration, sudden drops, and heavy impacts—if your battery isn’t mounted correctly, cables can loosen, connectors may break, and overall safety is compromised.
Riders often rely on brackets, trays, or subframe cradles designed to hold the battery firmly in place. Adding foam padding or rubber isolation strips helps absorb shocks and prevents the pack from rubbing against sharp edges. For lightweight builds, Velcro straps and reinforced zip ties can provide surprising durability when combined with proper cushioning.
It’s also important to route cables carefully. Keep them away from suspension travel zones, chain lines, or sharp bends where insulation could wear out. After installation, perform a shake test: simulate trail vibration by moving the bike or tapping the pack to ensure nothing shifts out of place.
A properly mounted battery doesn’t just last longer—it keeps your power delivery stable and your rides worry-free. 🔧
First Power-On: A Calm, Controlled Procedure
The first startup after an electric dirt bike DIY battery swap is a critical step that sets the tone for your bike’s performance and safety. Rushing into full throttle can lead to blown fuses, tripped BMS circuits, or even permanent damage. Instead, the goal is to ease the system into operation with patience and control.
Begin with the pack charged to around 40–60% state of charge. This middle range reduces stress on the cells and gives the BMS time to balance without the risks of overvoltage. Place the bike on a stand or elevate the rear wheel so you can safely test throttle response without moving forward unexpectedly.
Turn the key or engage the power switch while monitoring for unusual sounds, smells, or heat. Gradually apply throttle, starting with short pulses, then holding a steady low speed. If everything operates smoothly—no sparks, no cutouts—you can proceed to a light test ride on level ground.
This deliberate process not only protects your components but also gives you confidence that your installation is solid. By treating the first power-on as a system check rather than a performance test, you’ll catch potential issues early and enjoy smoother rides ahead. ⚡
Range Boost vs. Weight & Handling: Finding Balance
One of the biggest trade-offs in an electric dirt bike DIY battery swap is how added capacity affects the way your bike feels on the trail. More watt-hours usually mean extended range, but they also add extra pounds that can shift your center of gravity and change handling dynamics.
Lightweight packs keep your bike agile and responsive, making them ideal for jumps, tight turns, and technical riding. Heavier packs with higher capacity give you endurance for long hill climbs or all-day adventures, but the added weight can reduce maneuverability. Riders often have to decide whether they want pure performance or maximum ride time.
To better understand how capacity, voltage, and overall design impact riding style, our guide on what is an electric dirt bike provides useful context for matching battery size to real-world needs. Knowing how each upgrade affects balance helps you choose a setup that feels right for your terrain and riding goals.
By experimenting with pack sizes and testing in controlled environments, you can find the sweet spot where performance, safety, and fun all align. ⚡
Troubleshooting Tree (From “No Power” to “Cuts Under Load”)
Even after a successful electric dirt bike DIY battery swap, small issues can appear during your first rides. Having a simple troubleshooting roadmap makes it easier to pinpoint problems quickly without guessing or replacing parts unnecessarily.
If the bike won’t power on, start by checking the fuse, then confirm polarity at the connectors with a multimeter. Many times, a loose connection or reversed polarity is the culprit. When the system powers on but cuts out under acceleration, it’s often a sign of the BMS hitting its current limit or cells sagging under load.
Sudden power drops on steep climbs may indicate the pack’s internal resistance is too high, or that the discharge rate doesn’t match the demands of the motor and controller. Random cutouts during normal riding can also be caused by vibration loosening ground wires or thermal protection triggering from overheating.
By following a logical sequence—fuse, connectors, BMS, cell health—you can resolve most issues before they escalate. This structured approach saves time, protects components, and ensures your rides remain smooth and reliable. 🔋
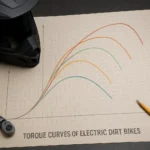
Table: Voltage/Capacity Options vs. Range & Cost
When planning an electric dirt bike DIY battery swap, it helps to see how different voltage and capacity options translate into real-world performance. Higher voltages can deliver more torque and efficiency, while larger amp-hour ratings extend ride time. But every upgrade comes with trade-offs in weight, price, and handling.
Here’s a simple comparison table to guide your choices:
| Pack Voltage | Capacity (Ah) | Energy (Wh) | Est. Trail Range | Approx. Cost | Notes |
|---|---|---|---|---|---|
| 48V | 20Ah | 960Wh | 20–35 mi | $$ | Balanced choice; reliable and widely supported |
| 52V | 20Ah | 1040Wh | 22–38 mi | $$–$$$ | Slight performance boost; check controller limits |
| 60V | 30Ah | 1800Wh | 35–60 mi | $$$ | Long range; heavier pack, requires solid mounting |
| 72V | 32Ah | 2300Wh | 45–75 mi | $$$$ | High power; advanced riders only with upgraded controllers |
Keep in mind that rider weight, terrain type, and tire pressure all influence the actual distance you’ll achieve. For trail riders, a moderate increase often provides the best balance, while endurance riders may prefer the added cost and bulk of larger packs. ⚡
7 Common DIY Mistakes (and How to Dodge Them)
Even the most careful riders can slip up during an electric dirt bike DIY battery swap, especially when rushing to finish the project. Knowing the most frequent errors helps you avoid frustration and keep your bike safe.
One common mistake is mixing pack voltage with a controller that isn’t designed for it, leading to instant shutdowns or blown components. Another is ignoring the BMS capacity, which can trigger cutoffs under heavy loads. Using cheap adapters or poorly crimped connectors often causes overheating and melted plugs.
Skipping proper strain relief is another oversight—loose cables rub against the frame, eventually breaking solder joints. Storing batteries fully charged for weeks at a time shortens their life, while charging on unsafe surfaces increases fire risk. Finally, riders often forget to torque down mounts after the first ride, which can result in vibration loosening critical parts.
By paying attention to these pitfalls and double-checking your work at each stage, you’ll not only extend the life of your battery but also ride with confidence knowing your system is solid. 🔧
Maintenance That Extends Pack Life
After completing an electric dirt bike DIY battery swap, proper maintenance is the key to keeping your investment performing for years. Lithium-ion packs are powerful, but they need consistent care to deliver maximum range and reliability.
One golden rule is to avoid storing batteries at 100% charge. Instead, keep them around 50–60% when not in use for long periods. This practice reduces stress on the cells and slows capacity loss over time. Regular partial charging, rather than constant full cycles, also helps preserve health.
Temperature control is another crucial factor. Extreme heat can degrade cells rapidly, while freezing conditions can cause voltage drops and reduced performance. Store packs in a cool, dry place and always allow them to reach room temperature before charging.
Lastly, inspect connectors and wiring periodically. Corrosion, dust, or loose connections can lead to inefficiency or even dangerous overheating. By adopting these simple habits, you’ll protect your pack, maximize its lifespan, and enjoy dependable performance every time you hit the trails. 🔋
Budget vs. Premium: Where to Spend, Where to Save
When planning an electric dirt bike DIY battery swap, it’s tempting to cut corners, but not all components are created equal. Some areas are worth every penny, while others can be handled with budget-friendly alternatives without sacrificing performance.
Spending more on a high-quality BMS, low internal resistance cells, and reliable connectors pays off in both safety and long-term performance. These parts directly affect how your pack handles current draw, charging cycles, and overall durability. On the flip side, items like mounting hardware or cable management can often be done affordably with DIY solutions.
If you’re unsure about which upgrades truly impact performance, our guide to what is an electric dirt bike provides a solid foundation for understanding how different components interact. The more you know about your system, the easier it becomes to decide where premium parts matter most.
This balance of saving smart and investing wisely ensures you get the range and reliability you want without overspending on unnecessary extras. ⚡
Real-World Build Examples (Light, Balanced, Endurance)
Seeing how other riders approach an electric dirt bike DIY battery swap can give you practical ideas for your own setup. Different builds highlight how capacity, weight, and voltage impact performance in real conditions.
A lightweight build focuses on agility, using a smaller pack with moderate amp-hours. This keeps the bike responsive for jumps, quick turns, and short rides on local trails. Balanced builds combine mid-range capacity with stable voltage, offering a mix of endurance and maneuverability—great for weekend riders who want both range and control.
Endurance builds push capacity and watt-hours higher, often with 60V or 72V packs. These are designed for long-distance rides, hill climbs, or all-day exploration, though the added weight means handling becomes less nimble. Riders choosing this path prioritize distance over tricks or aggressive technical riding.
By comparing these examples, you can identify which setup best matches your riding style and terrain. It’s about customizing performance so your bike feels like an extension of your riding goals. 🔋
Glossary (Beginner-Friendly)
To make sense of the terms you’ll encounter during an electric dirt bike DIY battery swap, here’s a quick glossary designed for riders who are just getting started. Keeping these definitions in mind will help you understand specs, troubleshoot issues, and talk with confidence about your setup.
- SoC (State of Charge): The current level of energy in the battery, shown as a percentage.
- DoD (Depth of Discharge): How much capacity is used before recharging; lower DoD = longer battery life.
- Wh (Watt-hour): The total amount of stored energy, calculated by voltage × amp-hours.
- Ah (Amp-hour): The measure of battery capacity, showing how long a pack can deliver current.
- IR (Internal Resistance): Resistance inside cells that affects efficiency and heat buildup.
- BMS (Battery Management System): Electronic circuit that balances cells and protects against overcharge, over-discharge, and overheating.
- Continuous vs. Peak Current: Continuous is the safe, sustained flow; peak is the short burst for acceleration.
- Anti-Spark Connector: A connector designed to prevent damaging sparks when plugging in.
- Thermal Runaway: A dangerous reaction where overheated cells can catch fire or explode.
This glossary is a rider’s cheat sheet for understanding the language of batteries, ensuring you approach upgrades and maintenance with clarity. ⚡
Resources & Templates
Having a set of ready-to-use resources makes any electric dirt bike DIY battery swap smoother and less stressful. Instead of trying to remember each step, keep these tools handy so you can focus on the work and ride with confidence afterward.
- 10-Step Checklist: A printable sheet outlining the process from voltage check to shakedown ride.
- Pre-Ride Inspection Card: A small reminder to check connectors, mounts, and charge level before hitting the trail.
- Safety Gear List: Gloves, fire-safe charging bag, multimeter, and protective eyewear—all the essentials for staying safe.
- Troubleshooting Flowchart: A simple visual guide to track down problems like cutouts, overheating, or sudden power loss.
- Maintenance Tracker: A log to record charge cycles, storage conditions, and performance notes for long-term monitoring.
These resources not only help keep the process organized but also reduce mistakes and provide peace of mind. Riders who prepare with templates and checklists are far more likely to complete their projects successfully and enjoy the full benefits of their upgraded pack. 🔧
FAQs (Real Queries)
Riders often have practical questions after completing an electric dirt bike DIY battery swap, and addressing them clearly helps avoid confusion. Here are some of the most common ones:
- Can I install a bigger battery without changing the controller?
Usually yes, as long as the voltage matches and the controller can handle the current. - Will a higher amp-hour pack make my bike faster?
No, capacity increases range, not speed. Speed comes from voltage and motor/controller pairing. - Is 52V safe to use on a 48V setup?
Sometimes—it depends on the controller’s tolerance. Exceeding specs can shorten lifespan or cause failure. - Do I need to upgrade the BMS too?
Yes, if your new pack draws more current than the stock BMS allows. Otherwise, you’ll face cutouts. - How long does a typical swap take?
For most riders, anywhere from 2 to 4 hours, depending on experience and tools. - Which connectors fit Sur Ron or Talaria bikes?
XT90 is common, but always confirm before purchasing. - How do I safely store a spare pack at home?
Keep it around 50–60% charge in a cool, dry place, away from direct sunlight. - Will swapping void my warranty?
In many cases, yes—check your manufacturer’s policy before making modifications.
These FAQs highlight real-world concerns and provide clarity for both new and experienced riders aiming for safe, reliable upgrades. ⚡
Share Your Build and Help the Crew
The best part of taking on an electric dirt bike DIY battery swap is joining a growing community of riders who share the same passion for customization and performance. Every build tells a story—whether it’s a lightweight pack for quick trail sessions or a heavy-duty setup built for endurance.
We’d love to hear about your experience. What challenges did you face during your project? Which tools or parts made the biggest difference? Sharing your results not only helps fellow riders learn but also builds a stronger knowledge base for everyone.
If you’re just getting started, our guide to what is an electric dirt bike can give you the background you need before attempting your first swap. Post your tips, photos, or even range numbers in the comments—your input could be the spark that helps another rider succeed.
Together, we can keep pushing the limits of what these bikes can do while saving money, extending range, and making off-road rides more exciting than ever. 🚀

Tyler Brooks is the storyteller behind most of the content at Electric Dirt Zone. With over 10 years of experience in digital media and a lifelong love for off-road riding, he blends technical insight from the team with engaging, down-to-earth writing. When he’s not turning dusty trail rides into blog posts, you’ll probably find him snapping pics before things get too wild.