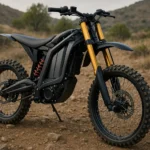
How to install regen braking on electric dirt bike might sound intimidating at first, but once you break it down, the process is straightforward and incredibly rewarding. Regen braking—short for regenerative braking—lets your motor act like a generator, slowing you down smoothly while feeding energy back into the battery 🔋. For riders who love hitting trails, downhill tracks, or urban streets, learning how to install this system correctly means safer rides, longer brake pad life, and better energy efficiency.
In this guide, we’ll walk you through exactly how to install regen braking on electric dirt bike setups, covering tools, controllers, wiring, and adjustments step by step. Whether you’re upgrading a Sur-Ron, a DIY conversion, or another e-moto build, the steps remain similar. We’ll also highlight common mistakes to avoid, from overloading your BMS to setting regen strength too aggressively on loose terrain 🌲.
Quick note before diving deeper: if you’re brand new to the electric moto scene, it’s smart to first check out our foundation guide what is an electric dirt bike. That way, you’ll understand basic terms like controller, motor phases, and battery management system before tackling regen.
By the end, you’ll know how to fine-tune your setup so regen works with your riding style instead of against it. And yes, we’ll explain how to avoid those scary moments where the rear wheel skids unexpectedly while braking on gravel 😅. Stick around—because once you learn how to install regen braking on electric dirt bike the right way, you’ll never want to go back.
Key Takeaways
- What regen braking is, when it’s worth it, and when it’s not.
- Exact parts/tools required and how to match them to your motor/controller.
- Safe wiring and programming that won’t trip your BMS or lock your rear wheel.
- Real-world tuning for trails: traction, switchbacks, downhills, and wet terrain.
- Troubleshooting checklist for “no regen,” weak regen, or error codes.
⚡ Heads-up: Use the quick links below to jump straight to the section you need most. It’s a fast lane to the good stuff 👇
Who This Tutorial Is For
This guide on how to install regen braking on electric dirt bike is designed for riders who want more control and efficiency out of their machines. Whether you’re a weekend trail explorer, a parent setting up an e-moto for your teen, or a DIY builder upgrading a custom project, this walkthrough has you covered.
If your electric dirt bike already has a programmable controller, or you’re curious about features like regenerative braking systems, brake sensors, and controller tuning, this tutorial will make things clear. Riders looking to extend brake pad life, improve downhill handling, or just geek out on the engineering side of e-motos will also benefit here.
No advanced engineering degree is required—just a willingness to learn, basic tools, and an interest in getting the most out of your ride ⚡. Think of this as the community’s roadmap to safer braking, smoother rides, and more fun on every trail.

Regen 101 for Electric Dirt Bikes
Regenerative braking works by converting the motor into a generator whenever you apply the brakes, turning motion into electricity that flows back into the battery 🔋. This process, often called energy recovery or negative current braking, reduces wear on brake pads and gives riders a smoother, more controlled way to slow down on dirt trails.
Learning how to install regen braking on electric dirt bike means understanding how the controller, battery management system, and brake sensors interact. Controllers that support regeneration settings allow you to fine-tune the amount of braking force, while proper wiring ensures safe operation. On loose gravel or wet trails, softer regen helps maintain traction, while on steep descents, stronger regen can keep your bike stable without overheating the rotors.
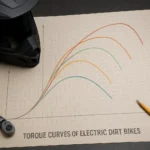
It’s not just about extending range. Regen braking provides better downhill control, helps prevent overheating, and makes your electric dirt bike feel more predictable in tough conditions. Riders who want a clear visual breakdown can watch this practical demo on Sur Ron regen braking explained, which shows how the system works in real riding scenarios.
7 Essential Checks Before You Start
Before diving into the actual setup, it’s crucial to go through a quick pre-installation checklist. Skipping these steps can lead to errors, safety risks, or wasted money on parts that don’t match your bike.
- Confirm your motor type—direct drive units work best with regen, while geared hubs with clutches won’t benefit.
- Check if your controller supports regenerative braking. Look for features like “E-ABS,” “negative current,” or “regen” in the specs.
- Verify your battery and BMS can handle the extra charge current pushed back during braking.
- Make sure your brake levers or sensors are compatible with electronic cutoffs.
- Confirm you have access to the programming tool or mobile app required to enable regen.
- Test throttle and brake signal ranges so they don’t overlap and cause unexpected cutoffs.
- Review your warranty—some manufacturers consider regen a modification.
Taking time to run through these checks ensures that when you move on to how to install regen braking on electric dirt bike, you’ll have a system that works safely and efficiently. Think of it as laying the foundation for smooth integration, reliable performance, and stress-free riding ⚡.
Parts and Tools You’ll Need
Getting regen braking installed isn’t just about flipping a switch—it requires the right components and setup. You’ll need a controller that supports regenerative braking systems, compatible brake levers or sensors, and a way to program settings through software or a mobile app. A multimeter, heat-shrink tubing, and a basic set of hand tools will also make the job much smoother 🔧.
When planning how to install regen braking on electric dirt bike, consider the compatibility of your motor and battery system. Controllers like VESC, Kelly, or Sabvoton often come with flexible regen options, while more budget-friendly units may offer only fixed levels. Double-check that your battery’s BMS can handle the extra charge flow during braking so you don’t trip safety limits.
If you’re new to the world of e-motos and want to brush up on the basics of controllers, motors, and battery systems before working on them, it’s worth starting with our community guide on what is an electric dirt bike. This background knowledge will help you understand why each part matters when setting up regen for real-world trail performance.
Compatibility and Safety First
Before making any changes, it’s important to confirm that your components are compatible. The battery management system must be able to handle the regenerative charge current, and the controller should clearly list regen or negative current support in its specifications. Skipping this step could result in tripped protection circuits or even permanent damage to your pack.
When setting up how to install regen braking on electric dirt bike, always consider terrain and traction. On loose dirt or sand, strong regen can cause the rear wheel to lock, while on steep downhill roads it provides much-needed stability. Safety comes first, so begin with mild settings and gradually increase strength as you test the feel. Riders who take this cautious approach usually find the balance that delivers smoother braking without risking skids or battery stress ⚡.
Controller Comparison: Regen Support at a Glance
Not every controller is created equal, and knowing the differences can save you a lot of frustration. Some models only offer basic on/off regenerative braking, while others allow fine-tuned adjustments through software or mobile apps. Choosing the right unit is key to balancing performance and safety on trails.
When exploring how to install regen braking on electric dirt bike, keep in mind that popular controllers like VESC or Phaserunner provide proportional regen, which feels smoother and more natural. Budget-friendly options such as certain KT models may only deliver fixed levels of braking force, limiting flexibility. High-end systems like ASI or Kelly give you detailed parameters to match terrain conditions, from steep descents to wet surfaces.
Here’s a quick snapshot of what to expect:
| Controller type | Regen support | Setup method | Trail notes |
|---|---|---|---|
| KT (Kunteng) | Basic regen | Display/PC | Good entry-level, limited tuning |
| VESC | Full control | Mobile/PC | Smooth, ideal for customization |
| Grin Phaserunner | Proportional | Suite/Display | Excellent for technical riders |
| Kelly | Adjustable | PC software | Powerful, rugged, but complex |
| ASI | Detailed regen | Vendor tool | High-performance builds |
By comparing these options, you’ll know which controller best matches your riding style and desired braking behavior.
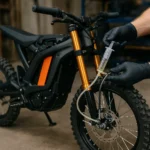
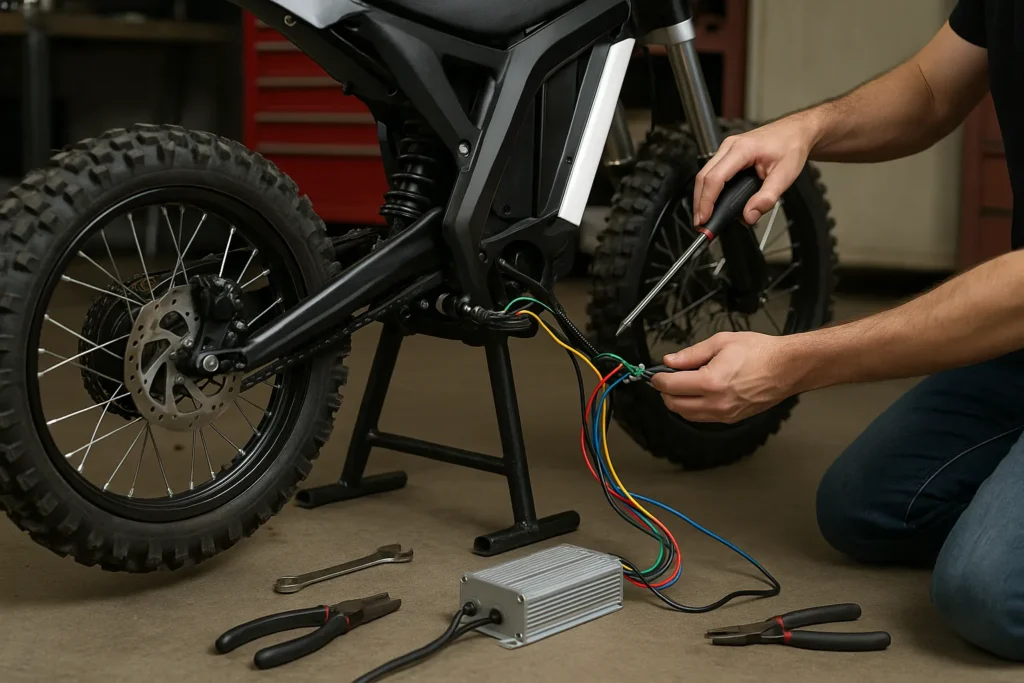
Wiring and Programming Walkthrough
Setting up regenerative braking requires both mechanical installation and software adjustments. Start by identifying the brake sensor wires and ensuring they connect correctly to the controller’s input. A clean wiring job with proper connectors and heat-shrink protection reduces the risk of signal loss or shorts during bumpy rides 🔧.
The next step is programming the controller. Most modern systems allow you to adjust parameters like battery regen current and motor negative current. Begin conservatively, testing low levels before moving toward stronger settings. This approach ensures your battery management system and motor can handle the extra load without triggering faults.
When you focus on how to install regen braking on electric dirt bike, remember that tuning isn’t just about raw numbers. Smooth deceleration, reliable cutoffs, and terrain-specific presets make the biggest difference. By balancing technical setup with real-world feel, you’ll get regen that improves safety, efficiency, and riding comfort on every trail.
First Ride Testing
Once the wiring and programming are complete, it’s time to test the system in a controlled environment. Begin by lifting the rear wheel off the ground and applying the brake lever to confirm that regenerative braking engages smoothly. The wheel should decelerate without abrupt locking, and you should hear or feel a subtle resistance as the motor feeds energy back into the battery 🔋.
During your first ride, practice in a safe, open area like a parking lot before heading onto trails. Start with gentle braking at low speeds, then gradually test on short downhill stretches. Pay attention to traction, battery behavior, and controller response. If the regen feels too aggressive, adjust the settings for softer engagement.
Learning how to install regen braking on electric dirt bike is only half the process—fine-tuning in real-world conditions ensures the system is safe, predictable, and enjoyable. This step transforms technical setup into a practical upgrade you can rely on every ride.
Tuning for Different Terrains
Regen braking isn’t one-size-fits-all. The way it performs depends heavily on the type of terrain and riding conditions. On loose gravel or sandy trails, strong regeneration can cause the rear wheel to skid, so it’s best to set a softer initial bite. In contrast, steep fire roads and long downhills benefit from stronger regen to control speed and reduce brake pad wear.
When riding in wet or muddy conditions, smoother and more progressive braking helps maintain traction. Riders tackling tight switchbacks often prefer minimal regen so the bike feels agile and predictable. Advanced controllers allow you to create different profiles, giving you the flexibility to switch between light, medium, or aggressive settings based on the ride.
Understanding how to install regen braking on electric dirt bike also means learning how to adjust it for real-world use. With careful tuning, regen becomes more than an energy-saving feature—it becomes a powerful tool for safety, control, and rider confidence ⚡.
Battery and BMS Considerations
Your battery pack and its management system play a huge role in how regenerative braking performs. Every time energy flows back into the pack, the BMS must regulate voltage and current to keep cells balanced and safe. If regen current is set too high, you risk triggering protection limits or shortening the lifespan of your battery cells 🔋.
When working on how to install regen braking on electric dirt bike, always check the maximum charge current your pack can safely accept. Matching regen levels to these limits ensures stable performance and avoids unnecessary stress on your system. Monitoring temperatures during long downhill runs is equally important, as sustained braking can generate extra heat inside both the controller and the battery.
If these technical terms feel new, you might find it useful to explore our beginner-friendly breakdown on what is an electric dirt bike. It gives riders the foundation needed to understand how motors, controllers, and batteries all work together in an e-moto setup.
Braking Strategy: Pads and Motor Together
Relying solely on regenerative braking isn’t ideal, especially for technical trails where quick stops are critical. The best approach is combining traditional brake pads with electronic regen to share the workload. Mechanical brakes provide immediate stopping power, while regen smooths out deceleration and reduces heat buildup on rotors.
When setting up how to install regen braking on electric dirt bike, remember that regen should be treated as a complement, not a replacement. By lightly applying the lever, you can let regen handle the initial slowdown before the pads engage. This technique not only extends pad life but also delivers more consistent performance during long downhill runs. For riders who push their bikes hard, mastering this hybrid braking strategy makes every ride safer and more efficient ⚡.
Common Mistakes to Avoid
Many riders make errors when first experimenting with regenerative braking, and these mistakes can lead to poor performance or even damage. One common issue is enabling regen at a full state of charge, which can overload the battery and cause the BMS to shut down unexpectedly. Another is setting regen strength too high on slippery terrain, leading to sudden wheel lockups and loss of control.
Skipping proper torque arms on hub motors is another dangerous oversight, as regen applies reverse torque that can stress dropouts. Failing to calibrate software settings carefully can also result in inconsistent braking behavior. Riders sometimes ignore firmware updates, missing out on improved regen control and safety features.
By taking the time to learn how to install regen braking on electric dirt bike properly, you avoid these pitfalls. Start with conservative settings, verify compatibility, and gradually increase braking force until it feels smooth and controlled. This method ensures reliable performance and keeps both your bike and your battery protected.
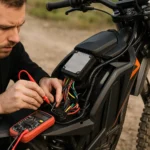
Troubleshooting Regen Issues
Even with the right setup, regenerative braking doesn’t always work perfectly on the first try. If the system fails to engage, the first step is to check wiring connections and confirm that the brake sensor is sending the correct signal to the controller. Loose or reversed polarity wires are often the culprit.
Weak regen usually points to conservative software settings, so increasing motor negative current within safe limits can help. Sudden BMS cutoffs often happen when regen is too strong while the battery is near a full charge, so lowering the charge current or avoiding testing at 100% state of charge is key.
For vibration, surging, or chatter during braking, extend the ramp time in the controller software to smooth out transitions. Error codes should always be cross-checked with your controller’s manual, as some systems use specific indicators for throttle overlap or hall sensor mismatches.
Understanding how to install regen braking on electric dirt bike includes knowing how to diagnose these common problems. With a systematic approach, most issues can be fixed quickly, turning frustration into a smoother, safer ride ⚡.
Maintenance and Logging
Once regen braking is properly installed, keeping it reliable comes down to regular maintenance and monitoring. After muddy or dusty rides, always inspect connectors and wiring harnesses for dirt or moisture, as these can interfere with brake sensor signals. Applying dielectric grease to plugs is a simple way to protect them from corrosion and water ingress.
Checking the brake levers or sensors for wear is equally important. A loose or damaged sensor can prevent regen from activating when you need it most. Logging ride data with apps or displays that track regen current and battery charge acceptance helps you fine-tune settings over time, making braking smoother and more predictable.
By treating upkeep as part of how to install regen braking on electric dirt bike, you extend the life of both your electrical system and your mechanical components. Regular inspection ensures consistent performance, giving you the confidence to tackle every trail knowing your braking system will respond exactly as expected ⚡.
Advanced Setups for Tinkerers
For riders who love pushing their bikes beyond stock settings, there are several advanced ways to take regenerative braking to the next level. One popular option is proportional regen, where braking force increases gradually with lever pressure instead of kicking in at a fixed level. This creates a smoother and more natural feel, especially on technical trails.
Another advanced setup is using throttle-back regen, where rolling the throttle in reverse engages braking. It frees up your levers and allows fine control with your hand, but requires careful calibration. Some controllers even support multiple braking maps, letting you switch between “downhill,” “wet,” or “trail” modes with the flick of a button. Displays that show live regen current can also help you monitor how much energy is being fed back into the battery in real time.
Exploring how to install regen braking on electric dirt bike with these advanced tweaks turns a basic feature into a performance tool. It’s not just about saving brake pads—it’s about tailoring the ride to match your personal style and the terrain you conquer ⚡.
Safety, Warranty, and Legal Notes
Before finalizing any modifications, it’s important to recognize the potential impact on safety and manufacturer coverage. Adding or adjusting regenerative braking may void certain warranties if the system wasn’t originally designed for it. Always review your bike’s documentation and consider contacting the manufacturer for clarification before making changes.
When working with electrical systems, there are risks of overheating, miswiring, or overloading the battery if regen settings are too aggressive. Proper protective gear, safe work practices, and conservative initial settings are essential to minimize hazards. For younger riders, parental supervision is strongly recommended to ensure safe adjustments.
Legal considerations also come into play. In some regions, modifications to electric vehicles—even for braking systems—must comply with local road safety laws. Riders should research their area’s regulations to stay compliant. Understanding how to install regen braking on electric dirt bike isn’t just about performance; it’s also about keeping your bike safe, reliable, and legal on the trails you ride ⚡.
FAQs About Regen Braking
Can I add regen braking to any electric dirt bike?
Not all bikes are compatible. Regen requires a controller that supports it and a motor capable of handling reverse current. Many direct drive systems work well, but geared hubs with freewheels usually cannot support regen.
How much range can regen braking really add?
Off-road riding typically sees only a small boost—around 5–10% at best. The bigger advantage is smoother downhill control and reduced brake pad wear, rather than dramatically longer battery life.
Is regen braking safe for my battery and BMS?
Yes, as long as settings are within the safe charge current limits specified by your battery management system. Overly aggressive regen can trip protections or shorten battery lifespan.
Do I need special brake levers or sensors for regen?
Most setups require electronic brake levers or inline sensors to trigger regen. These components send a signal to the controller so it knows when to activate regenerative braking.
Why does regen feel weak at low speeds?
The effect is strongest when the wheel is spinning faster. At very low RPMs, the motor generates less resistance, so regen naturally feels weaker.
Can regen braking replace my mechanical brakes?
No. Regen is a supplement, not a substitute. You’ll still need mechanical brakes for quick stops, emergency braking, and for times when regen isn’t effective, like low-speed maneuvers.
What happens if I use regen at 100% battery charge?
Feeding energy back into a fully charged battery can cause the BMS to shut down or even trigger faults. It’s best to avoid testing regen right after a full charge.
By addressing these common concerns, riders gain a clearer picture of what to expect when learning how to install regen braking on electric dirt bike, ensuring both performance and safety on every trail ⚡.
Share Your Setup and Join the Conversation
One of the best parts of riding electric dirt bikes is learning from the community. Every rider has a slightly different setup, from the type of controller to the battery size and terrain preferences. Sharing your experience helps others avoid mistakes and discover new ways to improve performance.
If you’ve recently experimented with regen, drop your favorite settings, challenges, or success stories in the comments. Whether you adjusted negative current, fine-tuned braking modulation, or found the perfect downhill profile, your feedback can help fellow riders get more out of their bikes ⚡.
Taking the time to explain your process also reinforces what you’ve learned while setting up how to install regen braking on electric dirt bike. It’s a win-win: you solidify your knowledge, and the community benefits from real-world insights. Don’t keep your best tricks to yourself—share them and help the next rider enjoy safer, smoother rides.
Final Thoughts
Installing regenerative braking may seem like a technical project at first, but with the right tools, patience, and clear steps, it quickly becomes a rewarding upgrade. The benefits go beyond saving brake pads—regen gives riders better control, more confidence on steep descents, and a smoother overall riding experience. Testing different levels and adapting settings for various terrains ensures you get the most out of your setup.
When learning how to install regen braking on electric dirt bike, the key is to balance performance with safety. Start small, fine-tune your controller, and always respect the limits of your battery and BMS. Over time, regen becomes second nature, making your bike feel more responsive and efficient.
For riders just starting their e-moto journey, it’s helpful to build a solid foundation of knowledge. Our community guide on what is an electric dirt bike is a great place to begin before diving into mods like regen braking. With the right preparation, every upgrade adds more fun, control, and reliability to your rides ⚡.

Tyler Brooks is the storyteller behind most of the content at Electric Dirt Zone. With over 10 years of experience in digital media and a lifelong love for off-road riding, he blends technical insight from the team with engaging, down-to-earth writing. When he’s not turning dusty trail rides into blog posts, you’ll probably find him snapping pics before things get too wild.